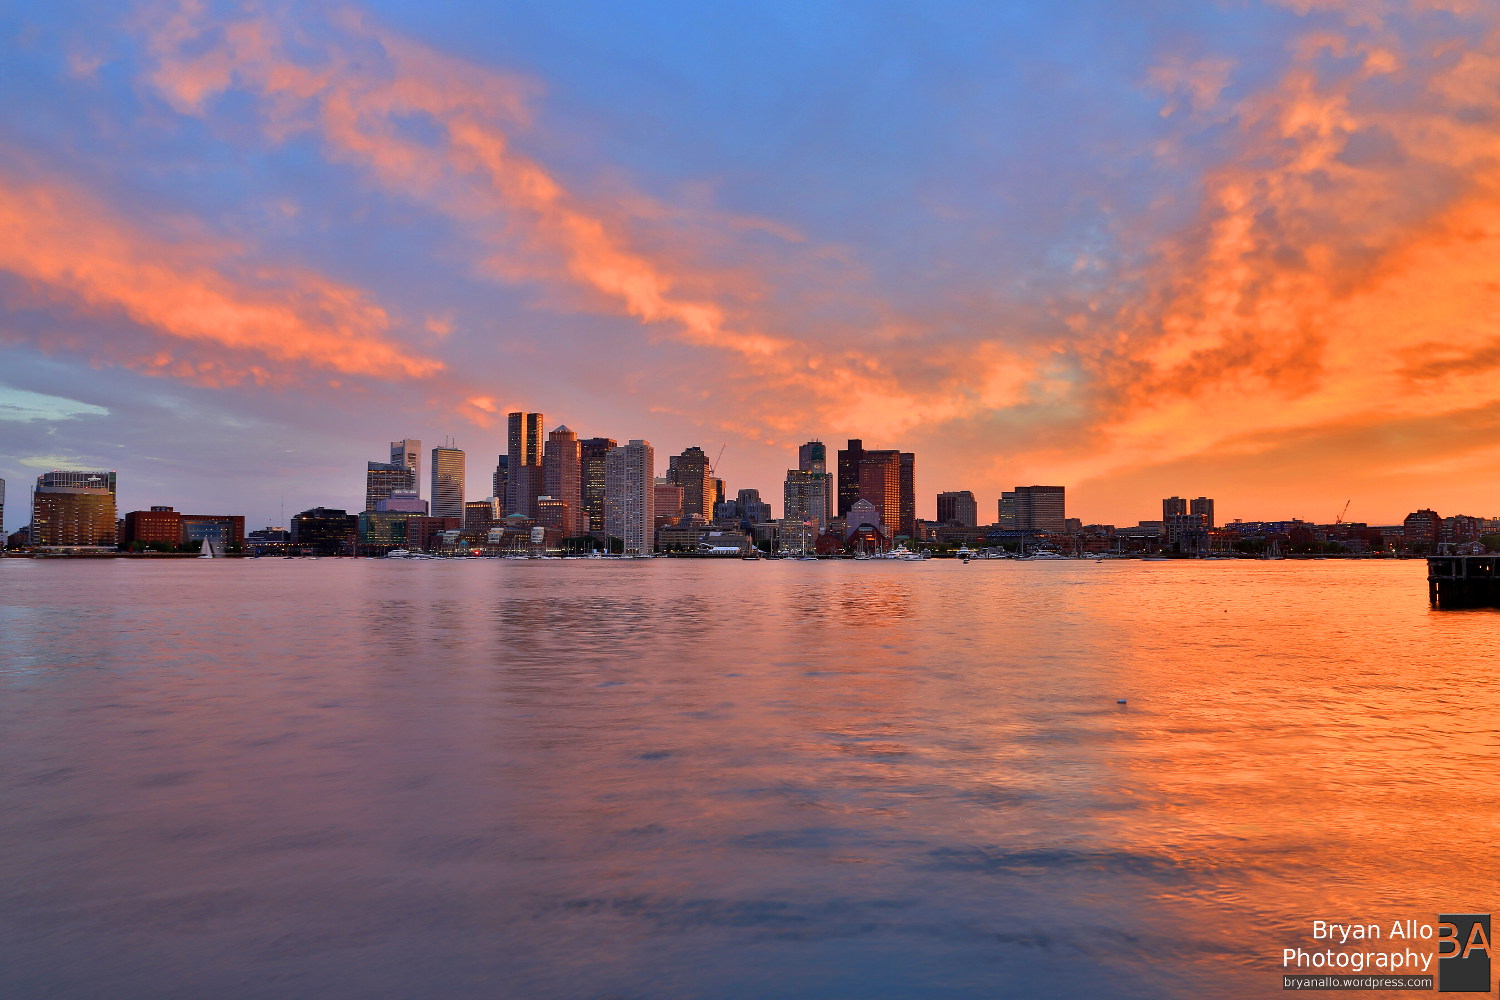
Crimson sunset over Boston – Canon 5D Mark III + EF 24-105mm f/4
This past Wednesday the fog and rain gave way for partly cloudy skies over Boston. What this meant for me was spectacular light shows at sunset, depending on what types of clouds were forming overhead. Usually this kind of weather leads to higher altitude clouds, the best kind. At sunset they reflect the red sunset light from the horizon back down against a backdrop of clear blue skies. The full spectrum of colors are just magical, a real treat.
All you have to do is show up about an hour before sunset, find a good vantage point, kick back and enjoy the magic hour. I spent some time on my flight and in the airports planning this shot, looking for the right perspective on the city at sunset and also the best unobstructed view of the skyline. Fortunately this key vantage point happens to be a public park. Thank you City of Boston for protecting this view for all! I often have to go places I really shouldn’t go, and the risks to myself and my gear are really not necessary – however often worth the shot.

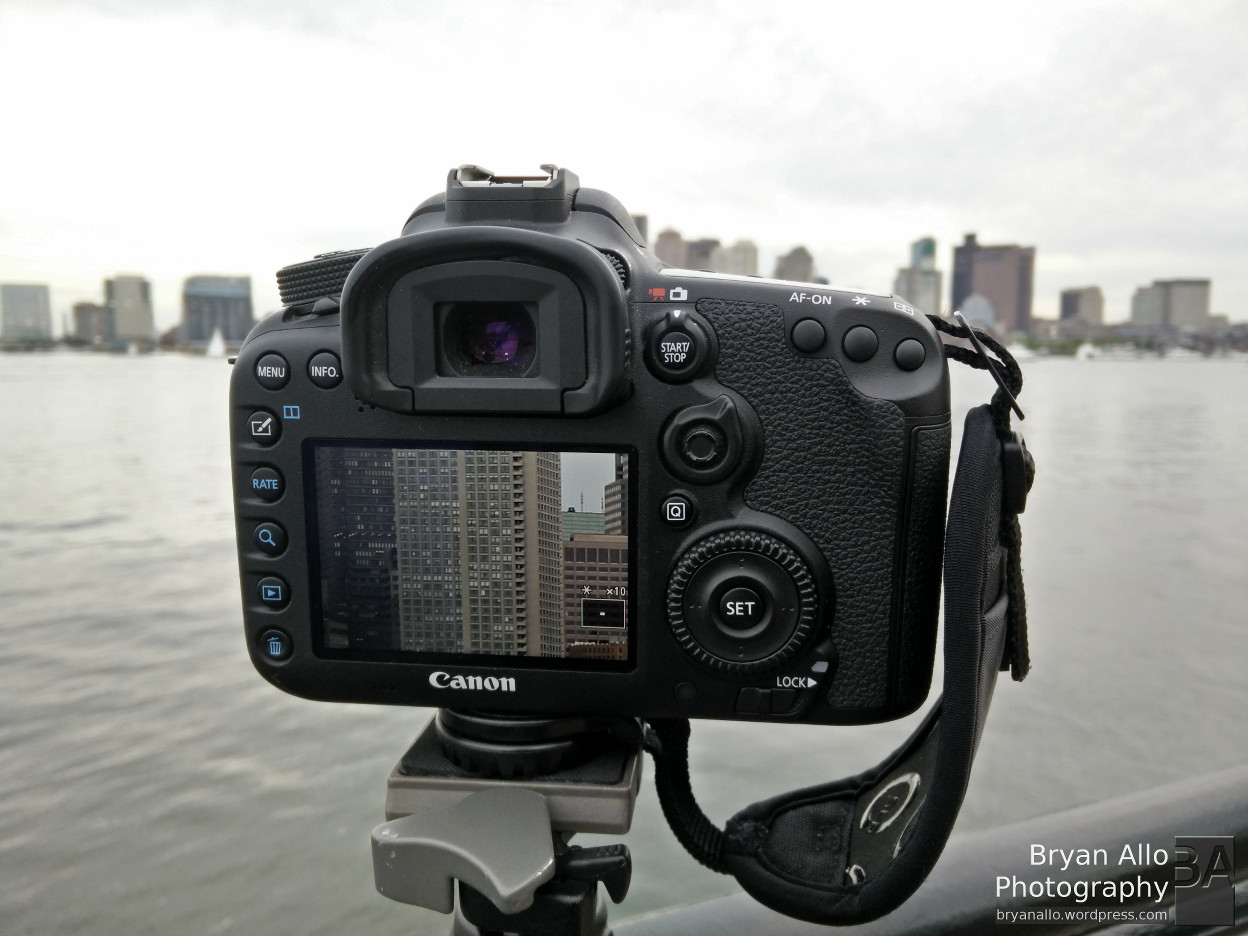
Fine tuning manual focus on the EF-S 17-55mm f/2.8 before starting the HDR time lapse
Sunset was around 8:30pm. I arrived the North Harbor before 7pm and scouted a bit before settling on this view. By 7:30pm I had configured and set off the 7D Mark II for a 3 hour HDR time lapse. What an amazing camera. When properly configured, you can save days of post processing time when doing HDR time lapse photography. I hope to post a how to on this soon. With the 7D Mark 2 on time lapse duty and time to spare before magic hour, I turned to setup the 5D Mark III.

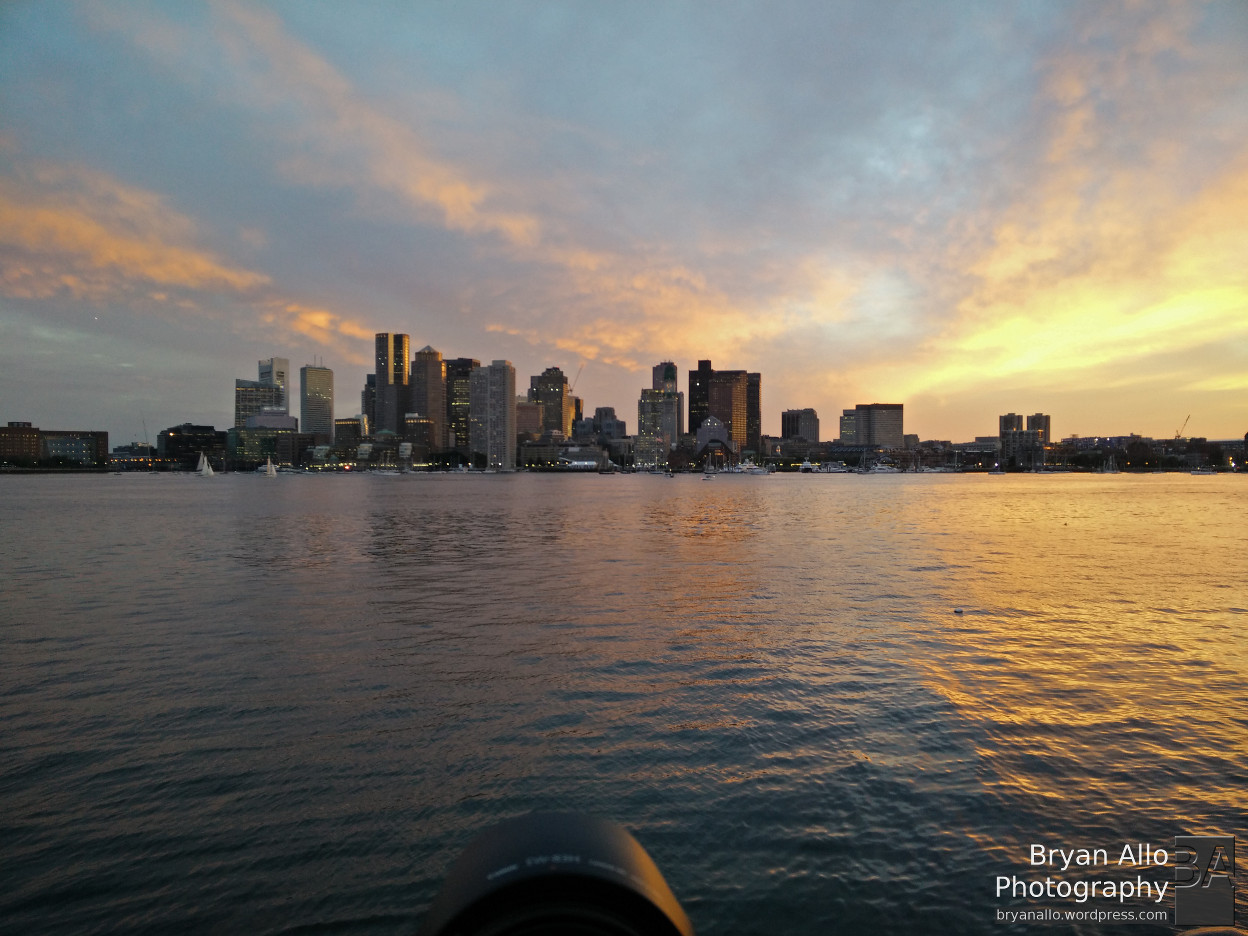
Magic Hour is here!
I brought the beastly EF 300mm f/2.8L IS Mark II on this trip, however it was a bit too long for this scene. The EF 70-200mm f/2.8L IS II would have been better suited. So I resorted to the trusted and versatile EF 24-105mm f/4L IS. It allowed me to switch from wide to telephoto with relative ease and enough detail for a signature high resolution panoramic shot. From this point on, with all my settings dialed in, it was pretty straight forward. So I just enjoyed the view and captured the magic. I am pleased with the shots I got and will be posting sneak peeks as soon as get them processed.
The final shots will be released as Limited Edition fine art canvas prints. The HDR time lapse shots will eventually be available as 4K video for anyone to license and use in their projects/productions. The video will also eventually accompany all limited edition prints in the form of a DVD screensaver. Here are some behind the scenes shots from this outing.

Managed to fit it all into the LowePro!

Setting up the 7D Mark II for HDR time lapse

Fine tuning manual focus on the EF-S 17-55mm f/2.8 before starting the HDR time lapse

All setup and ready for Magic Hour

Magic Hour is here!

I’m always behind the camera and forget to get proof that I was actually there! …LOL

Beautiful color changes

Quick panorama shot with phone.
Where was this shot taken?